toolsVisual Studio Code
Introduction
For the purposes of this course, I’m asking that everyone use the same text editor: Visual Studio Code (VS Code for short).
VS Code is a great choice because it’s free, extremely popular among developers and works on most common operating systems. Additionally, using the same text editor will:
- make it easier for me to recommend some sensible defaults to get you started
- ensure any screenshots, GIF screen captures or video demos I share are simple for you to follow along with
- mean it’s easier for you to help and be helped by your colleagues
Getting started
Download the stable build of VS Code for your operating system (OS); that link should update based on your OS.
After you’ve downloaded and installed VS Code, open it up and make sure the install worked as expected. Hopefully we can celebrate a bit at this point. 🙌🏻🎉
Get familiar with your text editor
Before going further, it will help to learn about it about the user interface of VS Code. You can either:
- read this intro to the VS Code user interface; you don’t need to read the whole thing and can stop when you finish the section titled Preview mode
- watch a walkthrough of the user interface in this 5-min video by Ornella, a member of the VS Code team:
After you complete the interface walkthrough, go back to your copy of VS Code and poke around a bit. I especially recommend clicking through the different icons on the Activity Bar so you start to explore what they offer and how they change what’s visible in the app.
Configuring your text editor
Before working on any demos or projects, let’s set some sensible defaults. VS Code has an immense number of settings you can configure, but we’re going to start with just two.
How you access settings depends on your OS:
- On Windows/Linux - File > Preferences > Settings
- On macOS - Code > Preferences > Settings
Want extra help or to learn more? See the instructions here.
On your Settings screen:
First, search for formatonsave.
💡 Searching for this as all one word, without spaces, will guarantee you get the right setting.
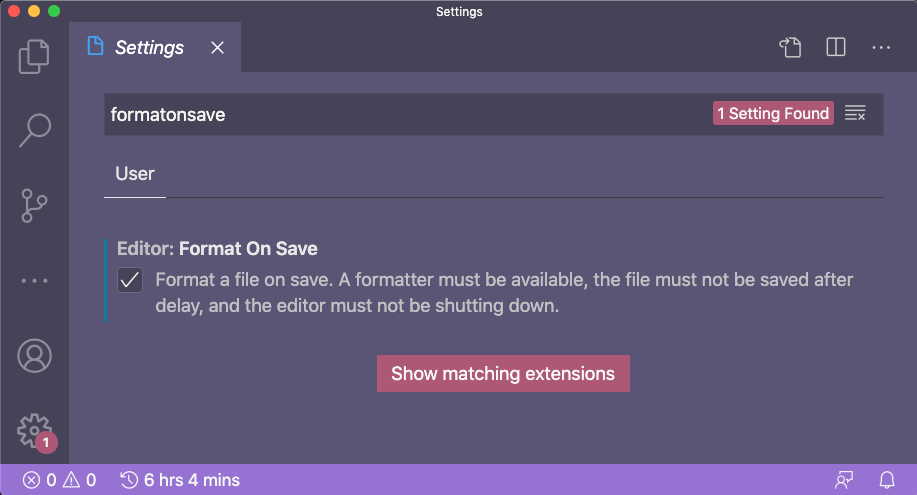
Make sure the checkbox next to “Format a file on save” is checked. As discussed, this will apply the appropriate formatting to your document every time you save.
Then, search for insertfinalnewline.
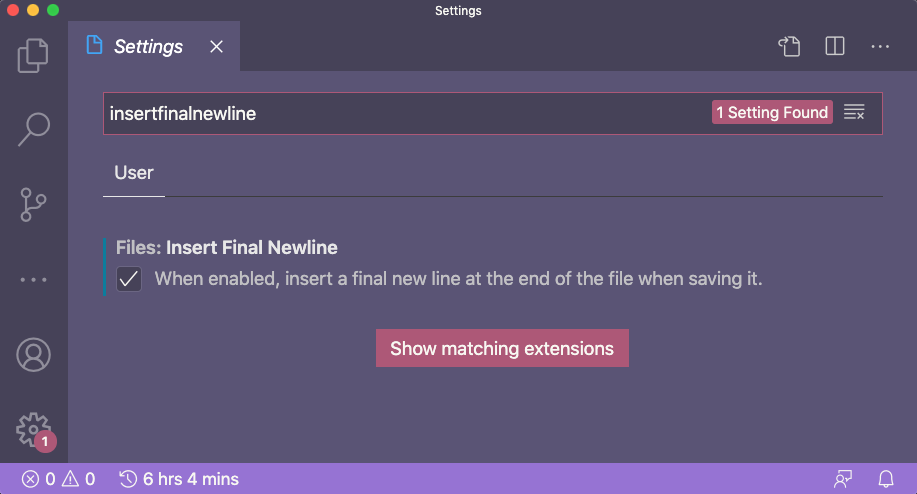
Make sure the checkbox next to this option is also checked.
After you’ve made these two changes, you can close your Settings; it will automatically save your changes.
Customizing your text editor
👀 Your VS Code will very likely not match mine exactly in terms of colors, icons and some other details. One of the other benefits of text editors is that they are often very extensible, which means you can add to or modify them with plugins or other code.
In VS Code, these are called extensions. You can browse and install extensions from inside the app by using the Activity Bar.
To get you started customizing VS Code, try using Angelique Weger’s pack of recommended extensions, which you can find by clicking the Extensions icon in the Activity Bar and searching for “MICA.” You should see a result titled MICA GD Pack and, if you click on that result, it will take you to a description page for the extension pack.
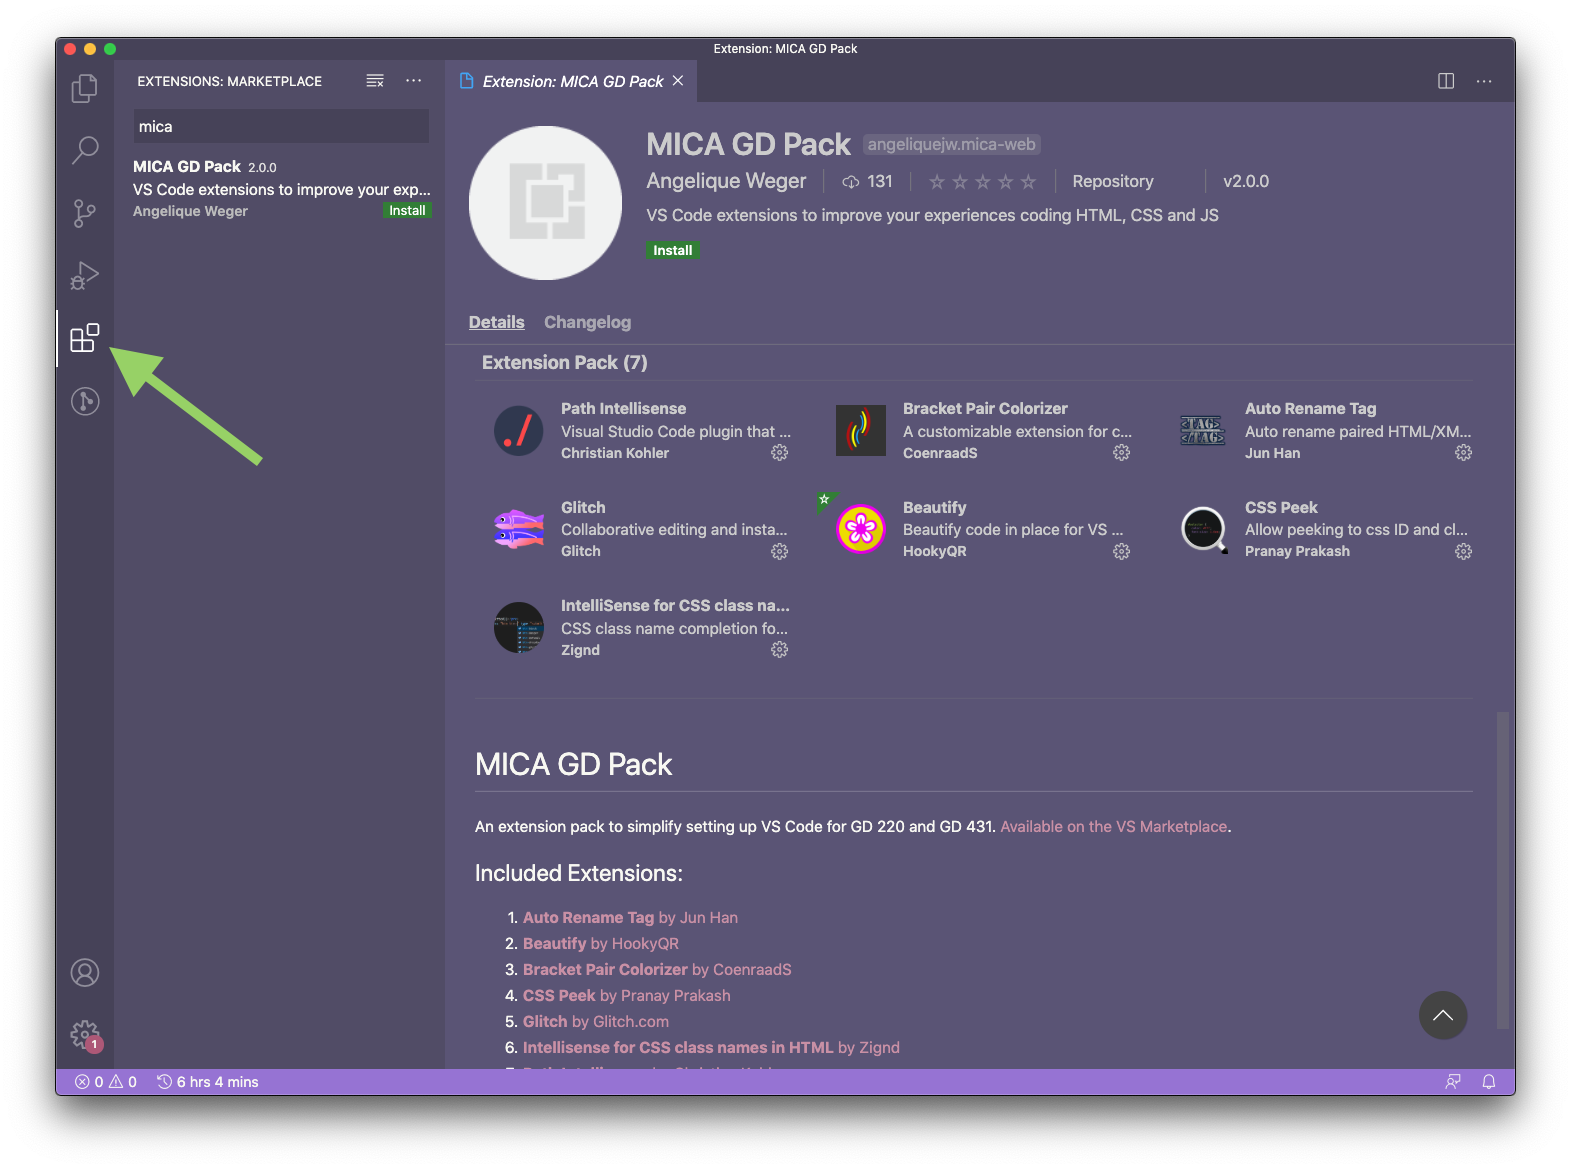
Clicking the Install button will add all the extensions in this pack to your copy of VS Code.
There are seven extensions included in this pack; please read the descriptions for each one and post any questions you have about how they work or what benefit they provide in the #general Slack channel.
After you’ve done that, have fun exploring VS Code’s color themes. Note that there are a handful of default themes included in the core app, but many more are available as extensions.